LVS负载均衡集群

1、集群

1.1 集群类型

软件集群:
lvs(传输层)
Nginx(应用层)
haproxy(应用层)

硬件集群:
F5
A10
Array
Redware
Netscaler

HA:
heartbeat
keepalived
corosync+pacemaker
RHCS

HPC:
hadoop

硬件集群和软件集群

硬件:F5负载均衡器 https://f5.com/
软件:LVS (工作在OSI第四层,传输层) Nginx(工作在OSI第七应用层)

LVS:Linux Virtual Server的简写,意即Linux虚拟服务器,是一个虚拟的服务器集群系统,此项目在1998年5月由章文嵩博士成立,是中国国内最早出现的自由软件项目之一。

集群特性

  • 可伸缩性(Scalability)比如:20台计算机为我们提供服务,可缩可减,可增可拓
  • 可靠性(Reliability)一部分计算机出现问题,并不影响对用户提供服务
  • 可管理性(Manageability)统一管理

1.2 集群分类

无论是哪种集群,都至少包括两台节点服务器,而对外表现为一个整体,只提供一个访问入口(域名或IP地址),相当于一台大型计算机。根据集群所针对的目标差异,可分为以下三种类型。

  1. 负载均衡集群Load Balance集群,简称LB,当一台服务器无法满足需求的时候,两台或多台服务器同时为客户端提供服务,以分担需求,提供轮询工作查询
  2. 高可用集群High Availability集群,简称HA,比如一台服务器出现故障的时候,但是不影响客户端体验,另外一台服务器担当这台服务器的工作!
  3. 高性能集群High Perfermance Computing集群,简称HPC,一台计算机是4路,那么100台计算机同时来辅助计算处理,就是400颗CPU!

2、LVS简介

Linux Virtual Server 是针对Linux内核开发的一个负载均衡项目,由我国的章文嵩博士在1998年5月创建,官方站点http://www.linuxvirtualserver.org/ 。 LVS实际上相当于基于IP地址的虚拟化应用,为基于IP地址和内容请求颁发的负载均衡提出了一种高效的解决方法。

LVS现在已成为Linux内核的一部分,默认编译为ip_vs模块,必要时能够自动调用。在CentOS 6系统中,以下操作可以手动加载ip_vs模块,并查看当前系统中ip_vs模块的版本信息。

1
2
3
4
5
[root@centos1 ~]# modprobe ip_vs
[root@centos1 ~]# cat /proc/net/ip_vs
IP Virtual Server version 1.2.1 (size=4096)
Prot LocalAddress:Port Scheduler Flags
-> RemoteAddress:Port Forward Weight ActiveConn InActConn

2.1 LVS的负载调度算法

  1. 轮询(Round Robin):将收到的访问请求按照顺序轮流分配给集群中的各节点(真实服务器),均等地对待每一台服务器,而不管服务器实际的连接数和系统负载。
  2. 加权轮询(Weighted Round Robin):根据真实服务器的处理能力轮流分配收到的访问请求,调度器可以自动查询各节点的负载情况,并动态调整其权重。这样可以保证处理能力强的服务器承担更多的访问流量。
  3. 最少连接(Least Connections):根据真实服务器已建立的连接数进行分配,将收到的访问请求优先分配给连接数最少的节点。如果所有的服务器节点性能相近,采用这种方式可以更好地均衡负载。
  4. 加权最少连接(Weighted Least Connections):在服务器节点功效 大的情况下,可以为真实服务器自动调整权重,权重较高的节点将承担更大的比例的活动连接制裁。

2.2 LVS 的优势

  • LVS工作在网络模型的4层,可以针对http应用做一些分流的策略,比如针对域名、目录结构。Nginx单凭这点可利用的场合就远多于LVS。

  • 最新版本的nginx也支持4层TCP负载。曾经这是LVS比nginx好的地方。

  • nginx对网络稳定性的依赖非常小,理论上能ping通就能进行负载功能,这个也是它的优势之一,相反LVS对网络稳定依赖性比较大。

  • nginx安装和配置比较简单测试起来比较方便,它的基本能把错误用日志打印出来。LVS的配置、测试就要花比较长时间了,LVS对网络依赖比较大。

总结:当并发超过nginx上限,就可以使用LVS了。日1000-2000W pv或并发请求1万以下都可以考虑用nginx。大型门户网站,电商网站需要用到LVS

官网http://www.linuxvirtualserver.org/index.html

中文资料
中文官方网站:http://zh.linuxvirtualserver.org/ http://www.linux-vs.org/zh/
LVS项目介绍 http://www.linuxvirtualserver.org/zh/lvs1.html
LVS集群的体系结构 http://www.linuxvirtualserver.org/zh/lvs2.html
LVS集群中的IP负载均衡技术 http://www.linuxvirtualserver.org/zh/lvs3.html
LVS集群的负载调度 http://www.linuxvirtualserver.org/zh/lvs4.html

2.3 LVS负载均衡的分层结构

  1. 负载调度器:这是访问整个集群系统的唯一入口,对外使用所有服务器共有的VIP (Virtual IP,虚拟IP)地址,也称为集群IP地址。通常会配置主,备两台调度器实现热备份,当主调度器失效以后平滑替换至备用调度器,确保高可用性
  2. 服务器池:集群所提供的应用服务(如HTTP,FTP)由服务器池承担,其中的每个节点具有独立的RIP(Real IP ,真实IP)地址,只处理调度器分发过来的客户请求。 当某个节点暂时失效时,负载调度器的容错机制会将其隔离,等待错误排除以后再重新纳入服务器池。
  3. 共享存储:为服务器池中的所有节点提供稳定,一致的文件存取服务,确保整个集群的统一性。在Linux/UNIX环境中,共享存储可以使用NAS设备,或者提供NFS(Network File System,网络文件系统)共享服务的专用服务器。

3、LVS负载均衡的工作模式

  1. 地址转换(Network Address Translation):简称NAT模式,类似于防火墙的私有网络结构,负载调度器作为所有服务器节点的网关,即作为客户机的访问入口,也是各节点回应客户机的访问出口。服务器节点使用私有IP地址,与负载调度器位于同一个物理网络,安全性要优于其他两种方式。

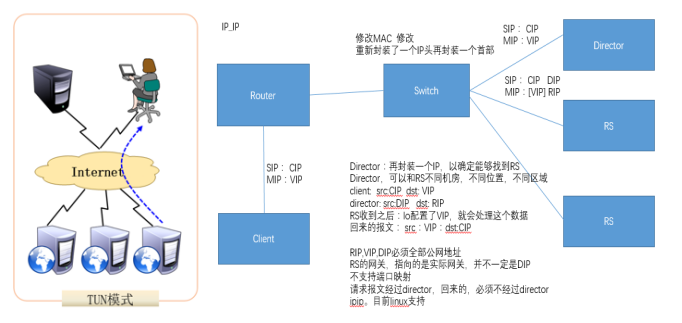
  2. IP隧道(IP Tunnel):简称TUN模式,采用开放式的网络结构,负载调度器仅作为客户机的访问入口,各节点通过各自的Internet连接直接回诮客户机,而不再经过负载调度器。服务器节点分散在互联网中的不同位置,具有独立的公网IP地址,通过专用IP隧道与负载调度器相互通信。

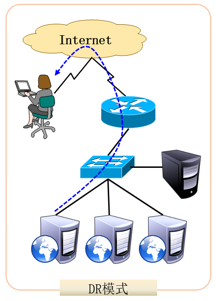
  3. 直接路由(Direct Routing):简称DR模式,采用半开放式的网络结构,与TUN模式的结构类似,但各节点并不是分散在务地,而是与调度器位于同一个物理网络。负载调度器与各节点服务器通过本地网络连接,不需要建立专用的IP隧道。

img

LVS三种模式的比较

NAT模式IPIP模式DR模式
对服务器结点要求服务结点可以是任何操作系统必须支持IP隧道模式,目前只有Linux服务结点支持虚拟网卡设备,能够禁用设备的ARP响应
网络要求拥有私有IP地址的局域网络拥有合法IP地址的局域网络或广域网拥有合法IP地址的局域网,服务结点与均衡器必须在同一个网段
通常支持结点数10~20个,试均衡器处理能力而定较高,可以支持到100个服务结点较高,可以支持到100个服务结点
网关均衡器即为服务器结点网关服务结点同自己的网关或者路由器连接,不经过均衡器服务结点同自己的网关或者路由器连接,不经过均衡器
服务结点安全性较好,采用内部IP,服务结点隐藏较差,采用公用IP地址,结点完全暴露较差,采用公用IP地址,结点完全暴露
IP要求仅需要一个合法IP地址 作为VIP除VIP外,每个服务结点需拥有合法IP地址,可以直接路由至客户端除VIP外,每个服务结点需拥有合法的IP地址,可以直接路由至客户端
比较TUNNATDR
配置复杂度复杂简单复杂
拓展性很好
支持数量>100<20>100
特点封装IP地址转化修改MAC
支持OS需要支持IPIP隧道Any大部分

三种模式下的压力测试

LVS 模式总耗时(s)总耗时(s)
NAT22.4804448.34
TUNNEL10.7079339.80
DR10.1779825.68

#TPS(Transaction Per Second)每秒系统处理事务的数量

可以看出 NAT 性能要比后两种差一倍。

网站性能测试工具webbench

4、LVS集群部署

4.1 配置地址转换模式(LVS—NAT)
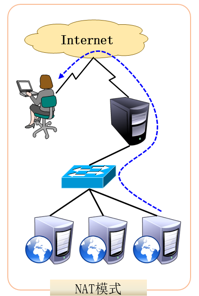
image-20191114193119335

实验环境:

image-20191114193144210

4.1.1 配置负载调度器

①加载ip_vs模块

1
2
3
4
5
[root@centos1 ~]# modprobe ip_vs
[root@centos1 ~]# cat /proc/net/ip_vs
IP Virtual Server version 1.2.1 (size=4096)
Prot LocalAddress:Port Scheduler Flags
-> RemoteAddress:Port Forward Weight ActiveConn InActConn

②安装ipvsadm管理工具

1
2
3
4
[root@centos1 ~]# rpm -ivh /media/Packages/ipvsadm-1.26-2.el6.x86_64.rpm
warning: /media/Packages/ipvsadm-1.26-2.el6.x86_64.rpm: Header V3 RSA/SHA1 Signature, key ID c105b9de: NOKEY
Preparing... ########################################### [100%]
1:ipvsadm ########################################### [100%]

③创建虚拟服务器

1
[root@centos1 ~]# ipvsadm -A -t 192.168.1.254:80 -s rr

-A: 添加虚拟服务器
-t:用来指定VIP地址及TCP端口
-s:用来指定负载调度算法—-轮询(rr),加权轮询(wrr),最少连接(lc),加权最少连接(wlc)

④添加服务器节点

1
2
[root@centos1 ~]# ipvsadm -a -t 192.168.1.254:80 -r 172.16.16.21:80 -m -w 1
[root@centos1 ~]# ipvsadm -a -t 192.168.1.254:80 -r 172.16.16.22:80 -m -w 1

⑤查看集群节点状态

1
2
3
4
5
6
7
[root@centos1 ~]# ipvsadm -ln
IP Virtual Server version 1.2.1 (size=4096)
Prot LocalAddress:Port Scheduler Flags
-> RemoteAddress:Port Forward Weight ActiveConn InActConn
TCP 192.168.1.254:80 rr
-> 172.16.16.21:80 Masq 1 0 0
-> 172.16.16.22:80 Masq 1 0 0

上述输出结果中,Forward列下的Masq对应Masquerade (地址伪装),表示采用的集群模式为NAT;如果是Route,则表示采用的集群模式为DR;如果是Tunnel,则表示采用的集群模式为TUN模式。

⑥保存负载分配策略
使用导出/导师入工具ipvsadm-save/ipvsadm-restore可以保存,恢复LVS策略,操作方法类似于iptables规则的导出,导入。通过系统服务ipvsadm也可以保存策略,如可执行“service ipvsadm save”;当然也可以快速清除,重建负载分配策略。

1
2
3
4
5
6
7
8
[root@Centos1 ~]# ipvsadm-save > /etc/sysconfig/ipvsadm
[root@Centos1 ~]# service ipvsadm stop
ipvsadm: Clearing the current IPVS table: [ OK ] //清除当前配置
ipvsadm: Unloading modules: [ OK ] //卸载模块

[root@Centos1 ~]# service ipvsadm start
ipvsadm: Clearing the current IPVS table: [ OK ] //清除当前配置
ipvsadm: Applying IPVS configuration: [ OK ] //添加模块

⑦配置SNAT转发规则

1
2
3
4
[root@Centos1 ~]# vim /etc/sysctl.conf
7 net.ipv4.ip_forward = 1
[root@Centos1 ~]# sysctl -p
[root@Centos1 ~]# iptables -t nat -A POSTROUTING -s 172.16.16..0/24 -o eth0 -j SNAT --to-source 192.168.1.254

⑧闭防火墙(LVS跟防火墙有冲突会导致访问失败,需要关闭防火墙)

1
2
3
4
[root@Centos1 ~]# service iptables stop
iptables: Setting chains to policy ACCEPT: filter [ OK ]
iptables: Flushing firewall rules: [ OK ]
iptables: Unloading modules: [ OK ]

4.1.2 配置NFS共享存储服务

①安装nfs-utils rpcbind软件包

1
2
3
[root@centos4 ~]# yum install –y nfs-utils rpcbind
[root@Centos4 ~]# chkconfig nfs on
[root@Centos4 ~]# chkconfig rpcbind on

②设置共享目录

1
2
3
[root@centos4 ~]# mkdir /wwwroot
[root@centos4 ~]# vim /etc/exports
/wwwroot 172.16.16.0/24(rw,sync,no_root_squash)

其中客户机地址可以是主机名,IP地址,网段地址,允许使用,?通配符;权限选项中的rw表示允许读写(ro为只读),sync表示同步写入,no_root_squash表示当客户机以root身份访问时赋予本地root权限(默认是root_squash,将作为nfsnobdy用户降权对待)。
*
③启动NFS服务程序**

1
2
3
4
5
6
7
[root@centos4 ~]# service rpcbind start
[root@centos4 ~]# service nfs start
Starting NFS services: [ OK ]
Starting NFS quotas: [ OK ]
Starting NFS mountd: [ OK ]
Starting NFS daemon: [ OK ]
Starting RPC idmapd: [ OK ]

注意:一定要先启动rpcbind然后才能启动nfs 否则nfs服务将启动失败。
④查看本机发布的NFS共享目录

1
2
3
[root@centos4 ~]# showmount -e
Export list for centos4.benet.com:
/wwwroot 172.16.16.0/24

⑤挂载之前记得关闭防火墙

1
[root@centos4 ~]# service iptables stop

4.1.3 在web1(Real Server1)中挂载NFS共享资源

①安装rpcbind软件包,并启动rpcbind服务
若要正常访问NFS共享资源,客户机中也需要安装rpcbind软件包,并ynfcrpcbind系统服务别外,为了使用showmount查询工具,建议将nfs-utils软件包也一并将上。

1
2
3
[root@Centos2 ~]# yum install –y rpcbind nfs-utils
[root@Centos2 ~]# chkconfig nfs on
[root@Centos2 ~]# chkconfig rpcbind on

如果已经安装了nfs-utils软件包,则客户机可以使用showmount查看NFS服务器的共享目录

1
2
3
[root@Centos2 ~]# showmount -e 172.16.16.188
Export list for 172.16.16.188:
/wwwroot 172.16.16.0/24

②手动挂载NFS共享目录

1
>[root@Centos2 ~]# mount 172.16.16.188:/wwwroot /var/www/html/

mount.nfs: /var/www/html is busy or already mounted
[root@Centos2 ~]# df
Filesystem 1K-blocks Used Available Use% Mounted on
/dev/mapper/vg_centos1-lv_root 47066056 4228644 40446580 10% /
tmpfs 957760 72 957688 1% /dev/shm
/dev/sda1 495844 39947 430297 9% /boot
/dev/sr0 4363088 4363088 0 100% /media
172.16.16.188:/wwwroot 47066112 4228608 40446720 10% /var/www/html

//已成功挂载

③设置fstab自动挂载

1
Echo “172.16.16.188:/wwwroot  /var/www/html           nfs     defaults,_netdev        0 0” >> /etc/fstab

4.1.4 在web2(Real Server2)中挂载NFS共享资源

(步骤跟web1是一样的)

④添加网页测试文件

1
[root@centos3 ~]# echo "www.benet.com" > /var/www/html/index.html

因为NFS共享存储就是为了实现内容同步,所以只要主机有共享存储的写入权限,那么写入的index.html测试文件,会立刻同步到服务器的/wwwroot目录下。

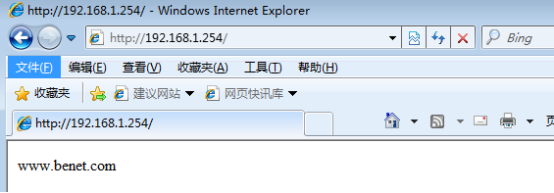
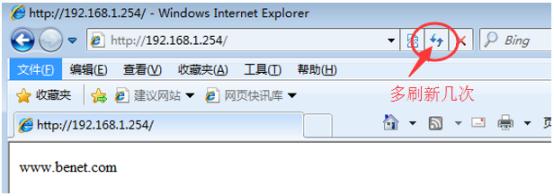
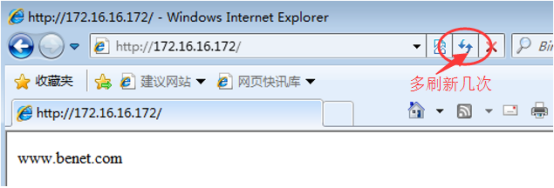
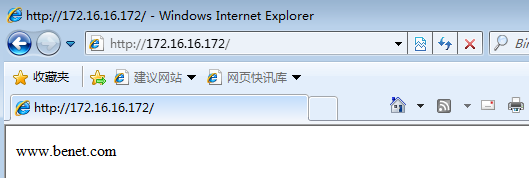
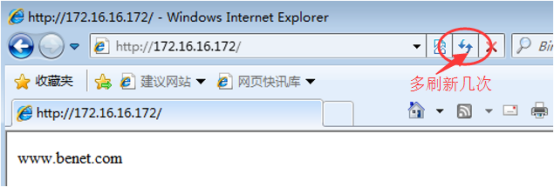
4.1.5 在客户机上测试集群效果
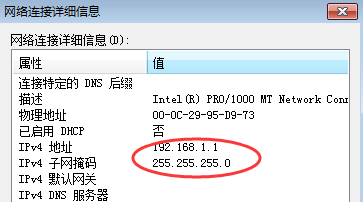
image-20191114194327759

image-20191114194339753

那怎么才能知道集群有没有生效呢?

image-20191114194404481

在LVS上用命令查看

1
[root@Centos1 network-scripts]# ipvsadm -ln

img

4.2 配置IP隧道(IP Tunnel)模式(LVS—TUN)

image-20191114194613102

image-20191114194627285

★ TUNNEL 模式必须在所有的realserver 机器上面绑定VIP的IP地址
★ TUNNEL 模式的vip ——>realserver 的包通信通过TUNNEL 模式,不管是内网和外网都能通信,所以不需要lvs vip跟realserver 在同一个网段内,但是服务器必须可以通达外网!
★ TUNNEL 模式 realserver会把packet 直接发给client 不会给director了
★ TUNNEL 模式走的隧道模式,所以运维起来比较难,所以一般不用

4.2.1 配置负载调度器

①加载ip_vs模块

1
2
3
4
5
[root@centos1 ~]# modprobe ip_vs
[root@centos1 ~]# cat /proc/net/ip_vs
IP Virtual Server version 1.2.1 (size=4096)
Prot LocalAddress:Port Scheduler Flags
-> RemoteAddress:Port Forward Weight ActiveConn InActConn

②安装ipvsadm管理工具

1
2
3
4
[root@centos1 ~]# rpm -ivh /media/Packages/ipvsadm-1.26-2.el6.x86_64.rpm
warning: /media/Packages/ipvsadm-1.26-2.el6.x86_64.rpm: Header V3 RSA/SHA1 Signature, key ID c105b9de: NOKEY
Preparing... ########################################### [100%]
1:ipvsadm ########################################### [100%]

③配置IP地址,网关,DNS

1
2
3
4
5
6
7
8
9
10
11
12
[root@centos1 ~]# cd /etc/sysconfig/network-scripts/
[root@centos1 network-scripts]# cp ifcfg-eth0 ifcfg-eth0:0
[root@centos1 network-scripts]# vim ifcfg-eth0
DEVICE=eth0
TYPE=Ethernet
ONBOOT=yes
NM_CONTROLLED=no
BOOTPROTO=none
IPADDR=172.16.16.173
NETMASK=255.255.255.0
GATEWAY=172.16.16.254
DNS1=172.16.16.254

④配置虚拟IP地址(VIP)

1
2
3
4
5
6
7
8
9
10
11
12
13
14
15
16
17
18
19
20
21
22
[root@Centos1 network-scripts]# vim ifcfg-eth0:0
DEVICE=eth0:0
TYPE=Ethernet
ONBOOT=yes
IPADDR=172.16.16.172
NETMASK=255.255.255.255
GATEWAY=172.16.16.254
DNS1=172。16。16。254
[root@Centos1 network-scripts]# service network restart
[root@Centos1 network-scripts]# ifconfig
eth0 Link encap:Ethernet HWaddr 00:0C:29:03:AF:59
inet addr:172.16.16.173 Bcast:172.16.16.255 Mask:255.255.255.0
inet6 addr: fe80::20c:29ff:fe03:af59/64 Scope:Link
UP BROADCAST RUNNING MULTICAST MTU:1500 Metric:1
RX packets:836 errors:0 dropped:0 overruns:0 frame:0
TX packets:545 errors:0 dropped:0 overruns:0 carrier:0
collisions:0 txqueuelen:1000
RX bytes:70613 (68.9 KiB) TX bytes:80995 (79.0 KiB)

eth0:0 Link encap:Ethernet HWaddr 00:0C:29:03:AF:59
inet addr:172.16.16.172 Bcast:172.16.16.172 Mask:255.255.255.255
UP BROADCAST RUNNING MULTICAST MTU:1500 Metric:1

⑤启用路由模式

1
2
3
4
5
6
7
8
9
10
11
12
13
14
15
16
17
18
19
20
21
22
23
[root@centos1 ~]# vim /etc/sysctl.conf
Controls IP packet forwarding

net.ipv4.ip_forward = 1 #将0改为1
或者 echo 1 > /proc/sys/net/ipv4/ip_forward 临时有效

[root@centos1 ~]# sysctl -p
net.ipv4.conf.all.send_redirects = 0
net.ipv4.conf.default.send_redirects = 0
net.ipv4.conf.eth0.send_redirects = 0
net.ipv4.ip_forward = 1
net.ipv4.conf.default.rp_filter = 1
net.ipv4.conf.default.accept_source_route = 0
kernel.sysrq = 0
kernel.core_uses_pid = 1
net.ipv4.tcp_syncookies = 1
net.bridge.bridge-nf-call-ip6tables = 0
net.bridge.bridge-nf-call-iptables = 0
net.bridge.bridge-nf-call-arptables = 0
kernel.msgmnb = 65536
kernel.msgmax = 65536
kernel.shmmax = 68719476736
kernel.shmall = 4294967296

⑥配置负载分配策略

1
2
3
4
5
[root@centos1 ~]# ipvsadm -A -t 172.16.16.172:80 -s rr
[root@centos1 ~]# ipvsadm -a -t 172.16.16.172:80 -r 172.16.16.21 -g -w 1
[root@centos1 ~]# ipvsadm -a -t 172.16.16.172:80 -r 172.16.16.22 -g -w 1
[root@centos1 ~]# service ipvsadm save
ipvsadm: Saving IPVS table to /etc/sysconfig/ipvsadm: [ OK ]

⑦查看集群节点状态

1
2
3
4
5
6
7
8
[root@centos1 ~]# ipvsadm –ln
[root@Centos1 network-scripts]# ipvsadm -ln
IP Virtual Server version 1.2.1 (size=4096)
Prot LocalAddress:Port Scheduler Flags
-> RemoteAddress:Port Forward Weight ActiveConn InActConn
TCP 172.16.16.172:80 rr
-> 172.16.16.21:80 Tunnel 1 0 0
-> 172.16.16.22:80 Tunnel 1 0 0

上述输出结果中,Forward列下的Tunnel对应IP隧道(IP Tunel),表示采用的集群模式为TUN;如果是Route,则表示采用的集群模式为DR;如果是Masq,则表示采用的集群模式为NAT模式。

⑧关闭防火墙(LVS跟防火墙有冲突会导致访问失败,需要关闭防火墙)

1
2
3
4
[root@Centos1 ~]# service iptables stop
iptables: Setting chains to policy ACCEPT: filter [ OK ]
iptables: Flushing firewall rules: [ OK ]
iptables: Unloading modules: [ OK ]

4.2.2 配置NFS共享存储服务

①安装nfs-utils rpcbind软件包

1
2
3
[root@centos4 ~]# yum install –y nfs-utils rpcbind
[root@Centos4 ~]# chkconfig nfs on
[root@Centos4 ~]# chkconfig rpcbind on

②设置共享目录

1
2
3
[root@centos4 ~]# mkdir /wwwroot
[root@centos4 ~]# vim /etc/exports
/wwwroot 172.16.16.0/24(rw,sync,no_root_squash)

其中客户机地址可以是主机名,IP地址,网段地址,允许使用*,?通配符;权限选项中的rw表示允许读写(ro为只读),sync表示同步写入,no_root_squash表示当客户机以root身份访问时赋予本地root权限(默认是root_squash,将作为nfsnobdy用户降权对待)。

③启动NFS服务程序

1
2
3
4
5
6
7
[root@centos4 ~]# service rpcbind start
[root@centos4 ~]# service nfs start
Starting NFS services: [ OK ]
Starting NFS quotas: [ OK ]
Starting NFS mountd: [ OK ]
Starting NFS daemon: [ OK ]
Starting RPC idmapd: [ OK ]

注意:一定要先启动rpcbind然后才能启动nfs 否则nfs服务将启动失败。

④查看本机发布的NFS共享目录

1
2
3
[root@centos4 ~]# showmount -e
Export list for centos4.benet.com:
/wwwroot 172.16.16.0/24

⑤挂载之前记得关闭防火墙

1
2
3
4
[root@centos4 ~]# service iptables stop
iptables: Setting chains to policy ACCEPT: filter [ OK ]
iptables: Flushing firewall rules: [ OK ]
iptables: Unloading modules: [ OK ]

4.2.3 配置 web1(Real Server1)节点服务器

①配置IP地址

1
2
3
4
5
6
7
8
9
10
[root@Centos2 ~]]# vim /etc/sysconfig/network-scripts/ifcfg-eth0
DEVICE=eth0
TYPE=Ethernet
ONBOOT=yes
NM_CONTROLLED=no
BOOTPROTO=none
IPADDR=172.16.16.21
NETMASK=255.255.255.0
GATEWAY=172.16.16.254
DNS1=172.16.16.254

②加载ipip模块

1
[root@Centos2 ~]# modprobe ipip

在加载好 ipip 模块后就会有默认的 tunl0 隧道。 注,如果没有在此处手动加载,那么使用 ifconfig tunl0 配置IP时,会自动加载 ipip 隧道模块。使用ifconfig tunl0或者ifconfig -a 可以查看关于tunl0的配置相关,使用ifconfig直接去查看是没有的

1
2
3
4
5
6
7
8
9
10
11
[root@Centos2 ~]# ifconfig tunl0
tunl0 Link encap:IPIP Tunnel HWaddr
NOARP MTU:1480 Metric:1
RX packets:0 errors:0 dropped:0 overruns:0 frame:0
TX packets:0 errors:0 dropped:0 overruns:0 carrier:0
collisions:0 txqueuelen:0
RX bytes:0 (0.0 b) TX bytes:0 (0.0 b)

[root@Centos2 ~]# lsmod | grep ipip //查看内核也已经支持
ipip 8371 0
tunnel4 2943 1 ipip

③配置虚拟IP地址(VIP)

1
2
3
4
5
6
7
8
9
10
11
12
13
14
15
16
17
18
19
20
21
22
23
24
25
26
27
28
29
30
31
32
33
34
35
36
37
38
39
[root@Centos2 ~]# cd /etc/sysconfig/network-scripts/
[root@Centos2 ~]# cd /etc/sysconfig/network-scripts/
[root@Centos2 network-scripts]# cp ifcfg-eth0 ifcfg-tunl0
[root@Centos2 network-scripts]# vim ifcfg-tunl0
DEVICE=tunl0
ONBOOT=yes
NM_CONTROLLED=no
BOOTPROTO=none
IPADDR=172.16.16.172
NETMASK=255.255.255.255
NAME=tunl0

[root@Centos2 network-scripts]# service network reload
[root@Centos2 network-scripts]# ifconfig
eth0 Link encap:Ethernet HWaddr 00:0C:29:72:37:6B
inet addr:172.16.16.21 Bcast:172.16.16.255 Mask:255.255.255.0
inet6 addr: fe80::20c:29ff:fe72:376b/64 Scope:Link
UP BROADCAST RUNNING MULTICAST MTU:1500 Metric:1
RX packets:1333 errors:0 dropped:0 overruns:0 frame:0
TX packets:868 errors:0 dropped:0 overruns:0 carrier:0
collisions:0 txqueuelen:1000
RX bytes:113367 (110.7 KiB) TX bytes:98981 (96.6 KiB)

lo Link encap:Local Loopback
inet addr:127.0.0.1 Mask:255.0.0.0
inet6 addr: ::1/128 Scope:Host
UP LOOPBACK RUNNING MTU:16436 Metric:1
RX packets:48 errors:0 dropped:0 overruns:0 frame:0
TX packets:48 errors:0 dropped:0 overruns:0 carrier:0
collisions:0 txqueuelen:0
RX bytes:3668 (3.5 KiB) TX bytes:3668 (3.5 KiB)

tunl0 Link encap:IPIP Tunnel HWaddr
inet addr: Mask:255.255.255.255
UP RUNNING NOARP MTU:1480 Metric:1
RX packets:0 errors:0 dropped:0 overruns:0 frame:0
TX packets:0 errors:0 dropped:0 overruns:0 carrier:0
collisions:0 txqueuelen:0
RX bytes:0 (0.0 b) TX bytes:0 (0.0 b)

④调整/proc响应参数

1
2
3
4
5
6
7
[root@Centos2 network-scripts]# echo 0 > /proc/sys/net/ipv4/ip_forward 
[root@Centos2 network-scripts]# echo 1 > /proc/sys/net/ipv4/conf/tunl0/arp_ignore
[root@Centos2 network-scripts]# echo 2 > /proc/sys/net/ipv4/conf/tunl0/arp_announce
[root@Centos2 network-scripts]# echo 1 > /proc/sys/net/ipv4/conf/all/arp_ignore
[root@Centos2 network-scripts]# echo 2 > /proc/sys/net/ipv4/conf/all/arp_announce
[root@Centos2 network-scripts]# echo 0 > /proc/sys/net/ipv4/conf/tunl0/rp_filter
[root@Centos2 network-scripts]# echo 0 > /proc/sys/net/ipv4/conf/all/rp_filter

或者使用下面的方法:(上面的方法一般在使用脚本的时候,会去这样写)

1
2
3
4
5
6
7
8
9
10
11
12
13
14
15
16
17
18
19
20
21
22
23
24
25
26
27
28
[root@Centos2 network-scripts]# vim /etc/sysctl.conf
net.ipv4.conf.tunl0.arp_ignore = 1 #这些在末尾添加
net.ipv4.conf.tunl0.arp_announce = 2
net.ipv4.conf.all.arp_ignore = 1
net.ipv4.conf.all.arp_announce = 2
net.ipv4.conf.tunl0.rp_filter = 0
net.ipv4.conf.all.rp_filter = 0

[root@Centos2 network-scripts]# sysctl –p #生效配置
net.ipv4.ip_forward = 0
net.ipv4.conf.tunl0.arp_ignore = 1
net.ipv4.conf.tunl0.arp_announce = 2
net.ipv4.conf.all.arp_ignore = 1
net.ipv4.conf.all.arp_announce = 2
net.ipv4.conf.tunl0.rp_filter = 0
net.ipv4.conf.all.rp_filter = 0
net.ipv4.conf.default.rp_filter = 1
net.ipv4.conf.default.accept_source_route = 0
kernel.sysrq = 0
kernel.core_uses_pid = 1
net.ipv4.tcp_syncookies = 1
net.bridge.bridge-nf-call-ip6tables = 0
net.bridge.bridge-nf-call-iptables = 0
net.bridge.bridge-nf-call-arptables = 0
kernel.msgmnb = 65536
kernel.msgmax = 65536
kernel.shmmax = 68719476736
kernel.shmall = 4294967296

⑤安装rpcbind软件包,并启动rpcbind服务
若要正常访问NFS共享资源,客户机中也需要安装rpcbind软件包,并ynfcrpcbind系统服务别外,为了使用showmount查询工具,建议将nfs-utils软件包也一并将上。

1
2
3
[root@Centos2 ~]# yum install –y rpcbind nfs-utils
[root@Centos2 ~]# chkconfig nfs on
[root@Centos2 ~]# chkconfig rpcbind on

如果已经安装了nfs-utils软件包,则客户机可以使用showmount查看NFS服务器的共享目录

1
2
3
[root@Centos2 ~]# showmount -e 172.16.16.188
Export list for 172.16.16.188:
/wwwroot 172.16.16.0/24

⑥手动挂载NFS共享目录

1
2
3
[root@Centos2 ~]# mount 172.16.16.188:/wwwroot /var/www/html/
mount.nfs: /var/www/html is busy or already mounted
[root@Centos2 ~]# df

Filesystem 1K-blocks Used Available Use% Mounted on
/dev/mapper/vg_centos1-lv_root 47066056 4228644 40446580 10% /
tmpfs 957760 72 957688 1% /dev/shm
/dev/sda1 495844 39947 430297 9% /boot
/dev/sr0 4363088 4363088 0 100% /media
172.16.16.188:/wwwroot 47066112 4228608 40446720 10% /var/www/html

//已成功挂载

⑦设置fstab开机自动挂载

1
echo “172.16.16.188:/wwwroot  /var/www/html           nfs     defaults,_netdev        0 0” >> /etc/fstab

⑧最后记得关闭防火墙

1
2
3
4
[root@centos3 network-scripts]# service iptables stop
iptables: Setting chains to policy ACCEPT: filter [ OK ]
iptables: Flushing firewall rules: [ OK ]
iptables: Unloading modules: [ OK ]

4.2.4 配置 web2(Real Server2)节点服务器

(步骤跟web1是一样的)

⑦添加网页测试文件

1
[root@centos3 ~]# echo "www.benet.com" > /var/www/html/index.html

因为NFS共享存储就是为了实现内容同步,所以只要主机有共享存储的写入权限,那么写入的index.html测试文件,会立刻同步到服务器的/wwwroot目录下。

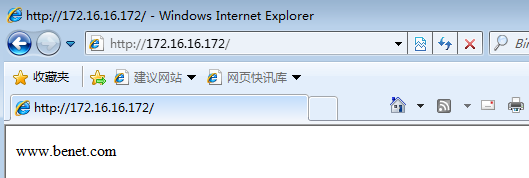
4.2.5 在客户机上测试集群效果
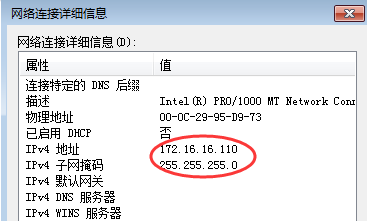
image-20191114195921383

image-20191114195931674

那怎么才能知道集群有没有生效呢?

image-20191114195955782

在LVS上用命令查看

1
[root@Centos1 network-scripts]# ipvsadm -ln

img

4.3 配置直接路由模式(LVS—DR)

image-20191114200058809

实验环境:

image-20191114200121424

4.3.1 配置负载调度器

①加载ip_vs模块

1
2
3
4
5
[root@centos1 ~]# modprobe ip_vs
[root@centos1 ~]# cat /proc/net/ip_vs
IP Virtual Server version 1.2.1 (size=4096)
Prot LocalAddress:Port Scheduler Flags
-> RemoteAddress:Port Forward Weight ActiveConn InActConn

②安装ipvsadm管理工具

1
2
3
4
[root@centos1 ~]# rpm -ivh /media/Packages/ipvsadm-1.26-2.el6.x86_64.rpm
warning: /media/Packages/ipvsadm-1.26-2.el6.x86_64.rpm: Header V3 RSA/SHA1 Signature, key ID c105b9de: NOKEY
Preparing... ########################################### [100%]
1:ipvsadm ########################################### [100%]

③配置IP地址

1
2
3
4
5
6
7
8
[root@centos1 ~]# cd /etc/sysconfig/network-scripts/
[root@centos1 network-scripts]# cp ifcfg-eth0 ifcfg-eth0:0
[root@centos1 network-scripts]# vim ifcfg-eth0:0
1 DEVICE=eth0:0
2 TYPE=Ethernet
3 ONBOOT=yes
4 IPADDR=172.16.16.172
5 NETMASK=255.255.255.0

//添加以上5行内容,橙色为行号

1
2
3
4
5
6
[root@centos1 network-scripts]# ifup eth0:0
Determining if ip address 172.16.16.172 is already in use for device eth0...
[root@centos1 network-scripts]# ifconfig eth0:0
eth0:0 Link encap:Ethernet HWaddr 00:0C:29:03:AF:59
inet addr:172.16.16.172 Bcast:172.16.16.255 Mask:255.255.255.0
UP BROADCAST RUNNING MULTICAST MTU:1500 Metric:1

④调整/proc响应参数
对于DR集群模式来说,由于LVS负载调度器和各节点需要共用VIP地址,应该关闭Linux内核的重定向参数响应。

1
2
3
4
[root@centos1 ~]# vim /etc/sysctl.conf
net.ipv4.conf.all.send_redirects = 0
net.ipv4.conf.default.send_redirects = 0
net.ipv4.conf.eth0.send_redirects = 0

//在任意位置添加以上3行

1
2
3
4
5
6
7
8
9
10
11
12
13
14
15
16
17
[root@centos1 ~]# sysctl  -p
net.ipv4.conf.all.send_redirects = 0
net.ipv4.conf.default.send_redirects = 0
net.ipv4.conf.eth0.send_redirects = 0
net.ipv4.ip_forward = 0
net.ipv4.conf.default.rp_filter = 1
net.ipv4.conf.default.accept_source_route = 0
kernel.sysrq = 0
kernel.core_uses_pid = 1
net.ipv4.tcp_syncookies = 1
net.bridge.bridge-nf-call-ip6tables = 0
net.bridge.bridge-nf-call-iptables = 0
net.bridge.bridge-nf-call-arptables = 0
kernel.msgmnb = 65536
kernel.msgmax = 65536
kernel.shmmax = 68719476736
kernel.shmall = 4294967296

⑤配置负载分配策略

1
2
3
4
5
[root@centos1 ~]# ipvsadm -A -t 172.16.16.172:80 -s rr
[root@centos1 ~]# ipvsadm -a -t 172.16.16.172:80 -r 172.16.16.21 -g -w 1
[root@centos1 ~]# ipvsadm -a -t 172.16.16.172:80 -r 172.16.16.22 -g -w 1
[root@centos1 ~]# service ipvsadm save
ipvsadm: Saving IPVS table to /etc/sysconfig/ipvsadm: [ OK ]

⑥查看集群节点状态

1
2
3
4
5
6
7
[root@centos1 ~]# ipvsadm -ln
IP Virtual Server version 1.2.1 (size=4096)
Prot LocalAddress:Port Scheduler Flags
-> RemoteAddress:Port Forward Weight ActiveConn InActConn
TCP 192.168.1.254:80 rr
-> 172.16.16.21:80 Route 1 0 0
-> 172.16.16.22:80 Route 1 0 0

上述输出结果中,Forward列下的Route对应模式为DR,表示采用的集群模式为DR;如果是Masq,则表示采用的集群模式为NAT;如果是Tunnel,则表示采用的集群模式为TUN模式。

⑦关闭防火墙(LVS跟防火墙有冲突会导致访问失败,需要关闭防火墙)

1
2
3
4
[root@Centos1 ~]# service iptables stop
iptables: Setting chains to policy ACCEPT: filter [ OK ]
iptables: Flushing firewall rules: [ OK ]
iptables: Unloading modules: [ OK ]

4.3.2 配置NFS共享存储服务

①安装nfs-utils rpcbind软件包

1
2
3
[root@centos4 ~]# yum install –y nfs-utils rpcbind
[root@Centos4 ~]# chkconfig nfs on
[root@Centos4 ~]# chkconfig rpcbind on

②设置共享目录

1
2
3
[root@centos4 ~]# mkdir /wwwroot
[root@centos4 ~]# vim /etc/exports
/wwwroot 172.16.16.0/24(rw,sync,no_root_squash)

其中客户机地址可以是主机名,IP地址,网段地址,允许使用*,?通配符;权限选项中的rw表示允许读写(ro为只读),sync表示同步写入,no_root_squash表示当客户机以root身份访问时赋予本地root权限(默认是root_squash,将作为nfsnobdy用户降权对待)。

③启动NFS服务程序

1
2
3
4
5
6
7
[root@centos4 ~]# service rpcbind start
[root@centos4 ~]# service nfs start
Starting NFS services: [ OK ]
Starting NFS quotas: [ OK ]
Starting NFS mountd: [ OK ]
Starting NFS daemon: [ OK ]
Starting RPC idmapd: [ OK ]

注意:一定要先启动rpcbind然后才能启动nfs 否则nfs服务将启动失败。

④查看本机发布的NFS共享目录

1
2
3
[root@centos4 ~]# showmount -e
Export list for centos4.benet.com:
/wwwroot 172.16.16.0/24

⑤挂载之前记得关闭防火墙

1
2
3
4
[root@centos4 ~]# service iptables stop
iptables: Setting chains to policy ACCEPT: filter [ OK ]
iptables: Flushing firewall rules: [ OK ]
iptables: Unloading modules: [ OK ]

4.3.3 配置 web1(Real Server1)节点服务器

①安装rpcbind软件包,并启动rpcbind服务
若要正常访问NFS共享资源,客户机中也需要安装rpcbind软件包,并ynfcrpcbind系统服务别外,为了使用showmount查询工具,建议将nfs-utils软件包也一并将上。

1
2
3
[root@Centos2 ~]# yum install –y rpcbind nfs-utils
[root@Centos2 ~]# chkconfig nfs on
[root@Centos2 ~]# chkconfig rpcbind on

如果已经安装了nfs-utils软件包,则客户机可以使用showmount查看NFS服务器的共享目录

1
2
3
[root@Centos2 ~]# showmount -e 172.16.16.188
Export list for 172.16.16.188:
/wwwroot 172.16.16.0/24

②手动挂载NFS共享目录

1
2
3
[root@Centos2 ~]# mount 172.16.16.188:/wwwroot /var/www/html/
mount.nfs: /var/www/html is busy or already mounted
[root@Centos2 ~]# df

Filesystem 1K-blocks Used Available Use% Mounted on
/dev/mapper/vg_centos1-lv_root 47066056 4228644 40446580 10% /
tmpfs 957760 72 957688 1% /dev/shm
/dev/sda1 495844 39947 430297 9% /boot
/dev/sr0 4363088 4363088 0 100% /media
172.16.16.188:/wwwroot 47066112 4228608 40446720 10% /var/www/html

//已成功挂载

③设置fstab开机自动挂载

1
echo “172.16.16.188:/wwwroot  /var/www/html           nfs     defaults,_netdev        0 0” >> /etc/fstab

④配置虚拟IP地址(VIP)

1
2
3
4
5
6
7
8
9
10
11
12
13
14
15
16
[root@centos2 ~]# cd /etc/sysconfig/network-scripts/
[root@centos2 network-scripts]# cp ifcfg-lo ifcfg-lo:0
[root@centos2 network-scripts]# vim ifcfg-lo:0
DEVICE=lo:0
IPADDR=172.16.16.172
NETMASK=255.255.255.255 //注意:子网掩码必须全为1

[root@centos2 network-scripts]# ifup lo:0
[root@centos2 network-scripts]# ifconfig lo:0
lo:0 Link encap:Local Loopback
inet addr:172.16.16.172 Mask:255.255.255.255
UP LOOPBACK RUNNING MTU:16436 Metric:1

[root@centos2 network-scripts]# vim /etc/rc.local //添加VIP本地访问路由
/sbin/rout add -host 172.16.16.172 dev lo:0
[root@centos2 network-scripts]# route add -host 172.16.16.172 dev lo:0

⑤调整/proc响应参数

1
2
3
4
5
[root@centos2 network-scripts]# vim /etc/sysctl.conf
net.ipv4.conf.all.arp_ignore = 1
net.ipv4.conf.all.arp_announce = 2
net.ipv4.conf.default.arp_ignore = 1
net.ipv4.conf.default.arp_announce = 2

//在任意位置添加以上4行内容

1
2
3
4
5
6
7
8
9
10
11
12
13
14
15
16
17
18
[root@centos2 network-scripts]# sysctl  -p
net.ipv4.ip_forward = 0
net.ipv4.conf.default.rp_filter = 1
net.ipv4.conf.all.arp_ignore = 1
net.ipv4.conf.all.arp_announce = 2
net.ipv4.conf.default.arp_ignore = 1
net.ipv4.conf.default.arp_announce = 2
net.ipv4.conf.default.accept_source_route = 0
kernel.sysrq = 0
kernel.core_uses_pid = 1
net.ipv4.tcp_syncookies = 1
net.bridge.bridge-nf-call-ip6tables = 0
net.bridge.bridge-nf-call-iptables = 0
net.bridge.bridge-nf-call-arptables = 0
kernel.msgmnb = 65536
kernel.msgmax = 65536
kernel.shmmax = 68719476736
kernel.shmall = 4294967296

⑥最后记得关闭防火墙

1
2
3
4
[root@centos3 network-scripts]# service iptables stop
iptables: Setting chains to policy ACCEPT: filter [ OK ]
iptables: Flushing firewall rules: [ OK ]
iptables: Unloading modules: [ OK ]

4.3.4 配置 web2(Real Server)节点服务器

(步骤跟web1是一样的)

⑦添加网页测试文件

1
[root@centos3 ~]# echo "www.benet.com" > /var/www/html/index.html

因为NFS共享存储就是为了实现内容同步,所以只要主机有共享存储的写入权限,那么写入的index.html测试文件,会立刻同步到服务器的/wwwroot目录下。

4.3.5 在客户机上测试集群效果
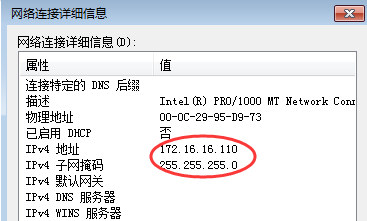
image-20191114200708573

image-20191114200725365

那怎么才能知道集群有没有生效呢?

image-20191114200740663

在LVS上用命令查看

1
[root@Centos1 network-scripts]# ipvsadm -ln

image-20191114200754511

-------------本文结束感谢您的阅读-------------